
For most New Zealand homes, the highest-impact energy efficiency improvements are ceiling and underfloor insulation, draughtproofing, a heat pump upgrade, and hot-water cylinder insulation. Done in that order, these four measures address the biggest sources of heat loss and running cost before you spend money on anything else.
Your priority checklist:
- Ceiling and underfloor insulation — EECA data shows insulation can save up to $330 a year on power bills for an average NZ home.
- Hot-water cylinder and pipe insulation — wrapping the cylinder and the first metre of pipe can save around $150 per year and is among the fastest paybacks available.
- Draughtproofing — seal gaps around doors, windows, wiring and plumbing penetrations. Low cost, DIY-friendly, immediate impact.
- Efficient heating — a heat pump can save approximately $122 per year compared to older heating methods; a hot-water heat pump saves around $284 per year.
- Behavioural changes — closing curtains at sunset saves roughly $80–$90 a year by retaining heat already in the room.
Concrete next steps: Borrow an Auckland Libraries HEAT kit for a free at-home audit, check your eligibility for Warmer Kiwi Homes grants, and book a professional assessment before committing to larger works.
Table of Contents
- Where NZ homes lose heat: a quick diagnostic
- What to fix first, next and later: a sequencing guide
- Insulation: what Auckland homeowners need to know
- Windows, glazing and draughtproofing: low-cost fixes first
- Heating systems: choosing, sizing and maintaining for NZ homes
- Ventilation and moisture control: avoid the side effects of a tighter home
- Lighting, appliances and habits that cut bills quickly
- Solar PV and batteries: when they make sense for your home
- Grants, loans and free support available in New Zealand
- DIY vs hiring professionals: planning a whole-home upgrade
- What a professional whole-home retrofit looks like
- Key takeaways
- The retrofit decisions that actually determine outcomes
- Sortedhomesolutions handles the whole project for you
- Authoritative NZ sources and further reading
Where NZ homes lose heat: a quick diagnostic
Most Auckland homes lose heat through the same four routes: the ceiling, the floor, the walls, and uncontrolled gaps around doors, windows, and service penetrations. Understanding which route is costing you the most helps you spend money where it matters.
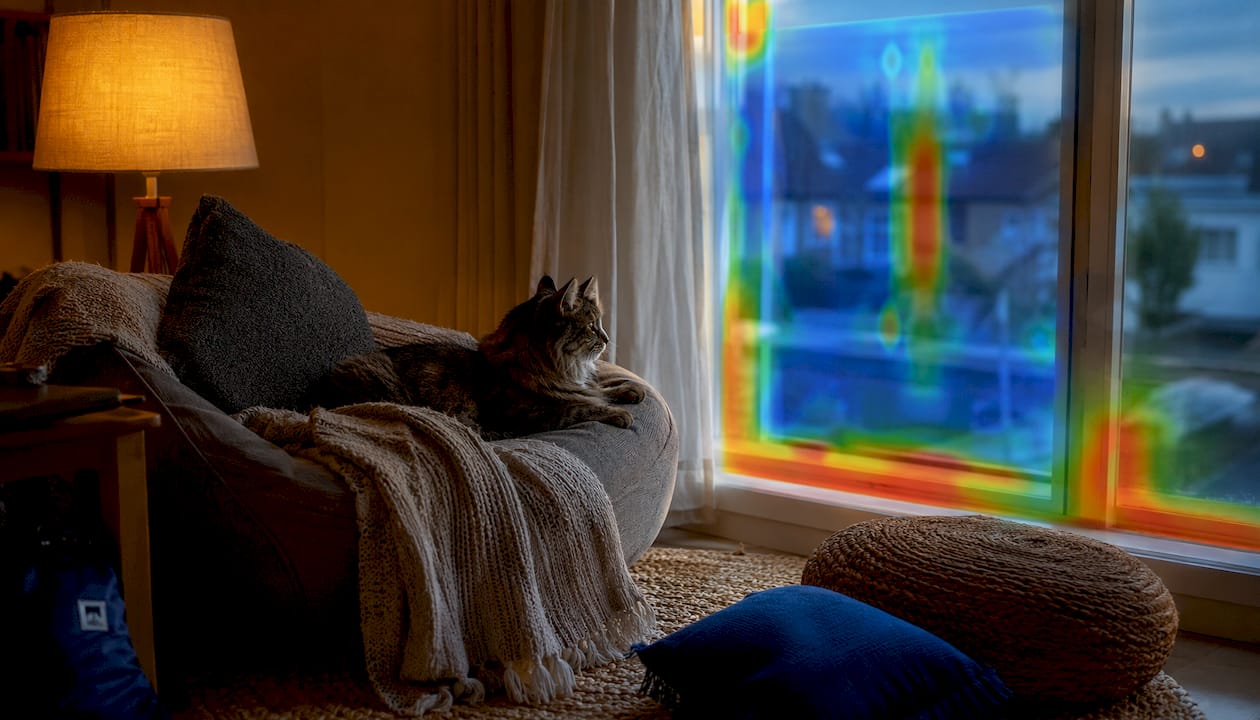
Ceiling and roof space account for the largest share of heat loss in most uninsulated NZ homes. Heat rises, and without adequate ceiling insulation, it escapes directly into the roof cavity. Cold spots on the ceiling or a room that cools down rapidly after you turn off the heater are reliable signs.
Underfloor heat loss is common in older Auckland homes built on timber piles with open subfloor spaces. Cold floors in winter, particularly in bathrooms and living areas, point directly to missing or degraded underfloor insulation. Moisture under the house can also degrade existing batts over time, so it is worth checking the condition of any insulation already in place.
Walls are harder to assess without specialist tools, but persistent cold patches on interior wall surfaces, especially on south-facing walls, suggest inadequate or absent wall insulation. Many pre-1980s Auckland homes have no wall insulation at all.
Gaps and draughts are often underestimated. Cold air entering around skirting boards, under doors, through unused fireplaces, and around electrical outlets can account for a meaningful share of heat loss in an otherwise reasonable home.
For a structured at-home check, Auckland Libraries loan out a Home Energy Audit Toolkit (HEAT kit) that includes an infrared thermometer, a hygrometer, and a power meter. Running through your home with the infrared thermometer on a cold morning gives you objective surface temperature data rather than guesswork, and the hygrometer flags moisture problems that need addressing alongside thermal fixes.
What to fix first, next and later: a sequencing guide
Getting the order right matters as much as the upgrades themselves. Fixing the thermal envelope before upgrading heating equipment means your new heater works in a house that actually holds heat.
Tier 1: Low cost, high impact (do these first)
- Seal draughts around doors, windows, skirting boards, and service penetrations using weatherstripping, gap filler, or door snakes.
- Close curtains at sunset to retain heat already in the room, saving roughly $80–$90 a year.
- Insulate the hot-water cylinder and the first metre of pipe.
- Clean heat pump filters monthly.
Tier 2: Moderate cost, high impact (prioritise within 12 months)
- Ceiling insulation (if absent or below current standards).
- Underfloor insulation (particularly for homes on timber piles).
- Upgrade to LED lighting throughout.
- Replace an ageing fridge or washing machine with a high-efficiency model.
Tier 3: Higher cost, longer payback (plan and fund carefully)
- Wall insulation (cavity or internal lining).
- Double glazing or secondary glazing for key rooms.
- Heat pump installation or replacement.
- Rooftop solar PV.
Pro Tip: Never install a high-performance heat pump before fixing insulation and draughts. A heat pump placed in a leaky, poorly insulated home works harder than it should, wears out faster, and delivers far less of its rated efficiency. Fix the envelope first, then size the heater to the improved home.
Insulation: what Auckland homeowners need to know
Insulation is typically the single highest-value upgrade for NZ homes. The reason is straightforward: it reduces the rate at which your home loses heat, which means every heating system you run costs less to operate. EECA reports savings of up to $330 a year from improving the thermal envelope, and that figure compounds when you combine ceiling, underfloor, and wall insulation together.
R-value is the measure of thermal resistance. Higher R-values mean better insulation performance. Current NZ building code minimums for new builds are R2.9 for ceilings and R1.3 for underfloors in Auckland's climate zone, but many older homes fall well below these figures. When upgrading, aim to meet or exceed current code minimums rather than simply adding any insulation.
Ceiling insulation is usually the first priority because it addresses the largest heat-loss pathway and is the most accessible space to work in. Blown-in glasswool or polyester batts are the most common options. Both are effective; blown-in product is faster to install in an existing roof space with limited access.
Underfloor insulation typically uses polyester or glasswool batts held in place with wire or netting. For homes with very low subfloor clearance, rigid board insulation is sometimes used instead. Moisture control under the floor matters here: if the subfloor is damp, a polythene ground sheet should be laid before insulation goes in. This is also a good point to check for any wall damage or framing issues that could affect moisture management in the wall cavity.
Wall insulation in existing homes is more complex. Cavity-wall injection (pumping loose-fill insulation through small holes drilled in the cladding) is the least disruptive option for weatherboard homes. Internal lining replacement is more disruptive but allows higher R-values and a chance to address any framing or moisture issues at the same time.
| Upgrade | Typical installed cost (NZ) | Representative annual saving | Approximate payback |
|---|---|---|---|
| Ceiling insulation | — | Up to $330 | 5 years |
| Underfloor insulation | — | Included in envelope saving | 5 years |
| Hot-water cylinder wrap + pipe | — | ~$150 | Under 2 years |
| Wall insulation (cavity injection) | — | Varies by home | 10 years |
When to hire a professional: Ceiling insulation in accessible roof spaces is within reach for a capable DIYer, but underfloor work in tight spaces and all wall insulation should be done by a qualified installer. Ask any installer about their approach to the continuous thermal envelope: gaps and compression in batts reduce performance significantly. Also ask how they manage moisture control, particularly for underfloor and wall work.
Windows, glazing and draughtproofing: low-cost fixes first
Draughtproofing is the most cost-effective window and door improvement you can make, and most of it is DIY. Before spending money on new glazing, work through this list:
- Apply self-adhesive foam or rubber weatherstripping to door and window frames where gaps are visible.
- Fit door snakes or threshold seals to external doors.
- Seal gaps around electrical outlets, skirting boards, and pipe penetrations with gap filler or foam tape.
- Block unused chimneys and fireplaces with a draught stopper or a fitted board.
- Check that rangehood and bathroom exhaust fans have functioning backdraught shutters.
Once draughts are addressed, assess your windows. Single-glazed aluminium-framed windows are common in Auckland homes built before 2000 and are a significant source of both heat loss and condensation. The options, in order of cost and disruption:
Shrink-wrap secondary glazing is a temporary, very low-cost solution (under $50 per window) that adds a layer of still air in front of the glass. It is effective for one or two winters while you plan a permanent upgrade.
Retrofit secondary glazing (acrylic or glass panels fitted to the existing frame) is a permanent, mid-cost option that avoids replacing the window unit entirely. It suits heritage homes where replacing the original joinery is not desirable.
Full double glazing delivers the best thermal and acoustic performance but involves replacing the entire window unit. Costs vary considerably by window size and frame material. Prioritise living areas and main bedrooms, where occupants spend the most time and where condensation is most likely to cause mould problems.
Heating systems: choosing, sizing and maintaining for NZ homes
A heat pump is the most efficient electric heating option available for most Auckland homes. Modern inverter-driven heat pumps deliver three to five units of heat for every unit of electricity consumed, which makes them substantially cheaper to run than electric panel heaters or oil-column heaters. The annual saving of approximately $122 compared to older heating methods reflects a typical household; homes replacing electric resistance heating will often save more.
Sizing matters. An undersized heat pump struggles to heat the space on cold days and runs continuously, wearing the compressor faster. An oversized unit short-cycles: it reaches the set temperature quickly, switches off, and the room cools rapidly, leading to uncomfortable temperature swings and reduced efficiency. A qualified installer should calculate the heat load for each room based on floor area, ceiling height, insulation levels, window area, and orientation. Do not accept a quote that skips this step.
Siting affects performance as well. The indoor unit should be positioned to distribute air across the full room without obstruction. The outdoor unit needs adequate airflow clearance and should not be placed where it will draw in exhaust air from a dryer vent or be shaded by dense vegetation.
Maintenance is straightforward but often neglected. Cleaning the indoor filter monthly prevents the system from overworking and can save roughly $50 a year in energy costs. An annual service by a qualified technician covers refrigerant pressure, coil cleaning, and electrical connections. For heat pump repair or more significant issues, a qualified HVAC technician should assess whether repair or replacement is the more cost-effective path, particularly for units over ten years old.
Ventilation and moisture control: avoid the side effects of a tighter home
Sealing a home to retain heat is the right move, but it needs to be paired with controlled ventilation. A tighter home with no ventilation strategy accumulates moisture from cooking, showering, breathing, and drying clothes indoors. That moisture leads to condensation on cold surfaces, mould growth, and eventually structural damage.
Act on these red flags immediately:
- Persistent condensation on windows, particularly in bedrooms overnight.
- Visible mould on walls, ceilings, or window frames.
- Musty smells in wardrobes, under-stair spaces, or the subfloor.
- Peeling paint or staining on interior walls near external corners.
Practical ventilation options:
- Fit or upgrade extraction fans in bathrooms and the kitchen. Run them during and for 15 minutes after showering or cooking.
- Open windows briefly each morning to flush overnight moisture, even in winter.
- Consider a heat recovery ventilator (HRV) or positive pressure ventilation system for homes where extraction alone is insufficient. These systems bring in fresh air while recovering heat from outgoing air.
- Address subfloor moisture with a polythene ground sheet and, where necessary, subfloor ventilation fans.
Pro Tip: Treat moisture, ventilation and thermal retention as one system, not three separate problems. Professional energy advisers consistently find that homes where these are addressed together outperform homes where each was fixed in isolation. Fixing insulation without improving ventilation can make condensation worse; fixing ventilation without insulation wastes the heat you are trying to retain.
Lighting, appliances and habits that cut bills quickly
Appliance upgrades and behavioural changes deliver savings with little or no capital outlay. The biggest running-cost opportunities are in hot water, refrigeration, and laundry.
Hot water is one of the five largest energy costs in a typical NZ home. If your cylinder is uninsulated, wrapping it costs under $300 and saves around $150 a year. A hot-water heat pump is a larger investment but saves approximately $284 a year compared to a standard electric cylinder, making it one of the strongest long-term appliance upgrades available.
Refrigeration runs continuously, so an old, inefficient fridge has a disproportionate impact on your annual bill. A fridge more than 15 years old is likely consuming significantly more electricity than a current Energy Star-rated equivalent. EECA's appliance calculator can quantify the difference for your specific model.
Laundry is a straightforward win. Switching to cold-wash cycles and running full loads rather than partial ones are simple behavioural changes that deliver measurable annual savings without any capital cost.
Quick DIY actions:
- Replace remaining incandescent or halogen bulbs with LED equivalents. LEDs use around 75–80% less energy for the same light output.
- Fit smart plugs to televisions, gaming consoles, and other devices that draw standby power.
- Set your hot-water cylinder thermostat to 60°C (the minimum safe temperature to prevent Legionella) rather than higher.
- Close curtains at sunset to retain heat, saving roughly $80–$90 a year.
Solar PV and batteries: when they make sense for your home
Rooftop solar is a sound long-term investment for many Auckland homes, but it works best after the efficiency measures above are already in place. A home that has reduced its baseline consumption through insulation and efficient appliances will get more value from a smaller, cheaper solar system.
Work through this checklist before committing:
- Roof suitability — north-facing roof area with minimal shading from trees or neighbouring buildings is ideal. East and west-facing panels still generate useful output but at reduced yield.
- Consumption profile — solar delivers the most value when your household uses significant electricity during daylight hours (working from home, EV charging, running a heat pump or pool pump during the day). Low daytime consumption means most generation is exported at a lower feed-in tariff.
- Payback horizon — upfront costs for a typical residential system are substantial. Payback periods depend on system size, your retailer's feed-in tariff, and your daytime consumption. Get at least three quotes and ask each installer to model your specific consumption profile.
- Feed-in tariff — check your current power plan's export rate before signing a solar contract. Some plans offer meaningfully higher rates for exported power, which changes the payback calculation.
- Battery storage — batteries extend the usefulness of solar by storing daytime generation for evening use, but they add significant cost and have their own replacement cycle. They make most sense for households with high evening consumption or those seeking resilience against outages.
Pro Tip: Complete your insulation and appliance upgrades before sizing a solar system. A home that has reduced its consumption first needs a smaller array to meet its needs, which lowers the upfront cost and shortens the payback period. Batteries should be the last addition, not the first.
Grants, loans and free support available in New Zealand
Funding is available for many of the upgrades covered in this article. The main programmes are straightforward to access once you know where to look.
Warmer Kiwi Homes is the primary government grant programme for eligible homeowners. It can cover 50–90% of the cost of ceiling and underfloor insulation and up to 80% of an efficient heater. Eligibility is based on Community Services Card or SuperGold Card holder status, or living in a lower-income area as defined by the programme. Applications are made through EECA-registered providers, not directly through EECA. The EECA website lists current registered providers by region.
EECA programmes and tools:
- The EECA website provides a home energy calculator and appliance comparison tools at no cost.
- EECA's registered installer network covers insulation and heating upgrades under Warmer Kiwi Homes.
- Free home energy advice is available through EECA's online resources and some regional programmes.
Auckland Council support:
- Auckland Council offers free home energy advice through its Home Energy Advisor service. A consultation covers ventilation, insulation, heating, and energy efficiency standards specific to your home.
- The Retrofit Your Home loan scheme closed to new applicants in 2020, but existing loan holders continue to repay through their rates bill. If you have an existing loan, the annual interest rate for the 2025/2026 rating year is 5.6%.
- Auckland Libraries HEAT kits remain available at no cost and are a practical first step before any paid assessment.
Other options to consider:
- Some power retailers offer interest-free or low-interest loans for heat pump and insulation upgrades. Check with your current retailer.
- The New Zealand Government's energy efficiency guidance page consolidates links to current programmes and eligibility tools.
DIY vs hiring professionals: planning a whole-home upgrade
Knowing which jobs you can do yourself and which need a qualified tradesperson saves money and avoids compliance problems. The DIY vs professional decision comes down to three factors: technical complexity, compliance requirements, and the cost of getting it wrong.
Questions to ask any contractor before hiring:
- What is your approach to the continuous thermal envelope? How do you handle junctions between ceiling, wall, and floor insulation?
- How do you manage moisture control during and after installation?
- Are you EECA-registered for Warmer Kiwi Homes work?
- Do you handle building consent applications, or does the homeowner need to arrange that separately?
- Can you provide references from comparable projects completed in the last 12 months?
- What warranties do you offer on materials and workmanship?
Red flags when reviewing quotes:
- No site visit before quoting (a phone or online quote for insulation or heating work is unreliable).
- No mention of moisture or ventilation considerations alongside thermal upgrades.
- Pressure to sign quickly or accept a package without itemised pricing.
- No clarity on who holds the building consent if one is required.
For larger projects involving multiple trades, an integrated project manager or full-service renovator coordinates the sequencing, manages consents, and ensures each trade's work does not undo another's. This approach typically costs less over the project lifetime than managing separate contractors independently.
Project planning checklist:
- Complete a home energy audit (HEAT kit or professional assessment).
- Define the scope of works in priority order (Tier 1 first).
- Check Warmer Kiwi Homes eligibility before committing to insulation or heating costs.
- Confirm consent requirements for your specific works with Auckland Council.
- Hire trades or a project manager and agree on a staged delivery schedule.
- Verify completed work against performance claims and obtain compliance documentation.
What a professional whole-home retrofit looks like
A well-managed retrofit follows a clear sequence. Understanding the steps helps you know what to expect and what to ask for at each stage.
Step 1: Initial assessment. A qualified assessor inspects the home, measures existing insulation R-values, checks for moisture and ventilation issues, and reviews heating and hot-water systems. This may include a HEAT kit measurement session or a more detailed blower-door test for air tightness in larger projects.
Step 2: Priority sequencing and scope definition. The assessor produces a prioritised scope of works, typically structured in the Tier 1/2/3 sequence described earlier. This document forms the basis for contractor quotes and funding applications.
Step 3: Funding check and consenting. Before works begin, confirm which elements qualify for Warmer Kiwi Homes grants. Check whether wall insulation, heat pump installation, or other works require a building consent. In Auckland, building consent requirements vary by work type and should be confirmed with Auckland Council or a registered building consent authority before work starts.
Step 4: Staged installation. Works proceed in priority order: thermal envelope first, then heating and ventilation, then appliances and solar if included. Staging avoids the common mistake of installing equipment into a home that has not yet been prepared to support it.
Step 5: Verification and documentation. On completion, the contractor provides compliance certificates, product warranties, and installation records. For insulation, this includes the R-value achieved and the product used. For heat pumps, it includes the model, capacity, and any consent documentation.
Realistic timelines and outcomes:
- Ceiling and underfloor insulation: typically completed in one to two days for a standard Auckland home.
- Heat pump installation: one day for a single unit; allow additional time for consent processing if required.
- Wall insulation (cavity injection): one to two days depending on home size.
- A full staged retrofit covering all tiers: typically four to twelve weeks from assessment to completion, depending on funding approvals and trade availability.
Homeowners who complete a staged retrofit report noticeably warmer, drier homes and measurable reductions in power bills. Documentation matters: keep all compliance certificates and warranties, as they are relevant to future property sales and insurance.
Key takeaways
Insulation, draughtproofing, and efficient heating deliver the largest and fastest returns for most Auckland homes, and Warmer Kiwi Homes grants can cover 50–90% of insulation costs for eligible households.
| Point | Details |
|---|---|
| Fix the envelope first | Ceiling and underfloor insulation save up to $330/yr; do this before upgrading heating equipment. |
| Hot-water cylinder wrap | Insulating the cylinder and first metre of pipe saves around $150/yr for under $300 outlay. |
| Check Warmer Kiwi Homes | Eligible homeowners can receive 50–90% grant cover for insulation and up to 80% for an efficient heater. |
| Treat the home as a system | Address moisture, ventilation and thermal retention together to avoid condensation and mould problems. |
| Sortedhomesolutions | Provides end-to-end project management for Auckland homeowners coordinating insulation, heating, consents and trades in one team. |
The retrofit decisions that actually determine outcomes
Most homeowners focus on which product to buy. The decisions that actually determine whether a retrofit performs as promised are about sequencing and coordination.
The most common mistake is installing a heat pump into a home that still has significant draughts and inadequate insulation. The unit runs harder, the room still feels cold on the coldest days, and the homeowner concludes that heat pumps are overrated. They are not. The problem is that the equipment was installed before the conditions that allow it to perform were in place.
The second common mistake is treating each upgrade as a separate project managed by a separate contractor. Insulation installed without considering the ventilation implications can increase condensation. Glazing upgraded without addressing draughts elsewhere in the same room delivers less improvement than expected. These are not failures of individual products. They are failures of coordination.
The whole-home approach recommended by Auckland Climate Action and consistent with EECA guidance is not a marketing concept. It reflects the straightforward reality that a house is a system, and changes to one part affect how other parts perform. An integrated project manager who understands this, and who coordinates trades in the right sequence, consistently delivers better outcomes than a series of disconnected single-trade jobs.
The funding is available. The products are proven. The variable that determines whether a retrofit actually delivers is whether someone is managing the whole picture.
Sortedhomesolutions handles the whole project for you
Planning a home energy upgrade in Auckland involves multiple trades, consent checks, funding applications, and sequencing decisions. Getting any one of those wrong adds cost and delays the savings you are trying to achieve.

Sortedhomesolutions manages the entire process from initial assessment through to completed installation, with one point of contact coordinating insulation, heating, ventilation, plastering, electrical, and any other trades your project needs. There is no need to find, brief, and schedule separate contractors or track which trade needs to finish before the next one can start. The team handles building consent applications where required and manages the sequencing so each stage of work supports the next.
For Auckland homeowners ready to move from planning to action, the practical next step is to get a quote or contact the team directly to discuss your home's specific needs and which upgrades to prioritise first.
Authoritative NZ sources and further reading
- EECA — Insulate your home: Detailed guidance on insulation types, R-values, and the savings case for ceiling, underfloor, and wall insulation.
- EECA — Easy ways to save on energy bills: Practical tips on behavioural changes, Warmer Kiwi Homes eligibility, and appliance maintenance savings.
- EECA — Get your home ready for winter: Specific guidance on hot-water cylinder insulation, heat pump savings, and winter preparation steps.
- EECA — Plan your home energy upgrades: The five biggest energy cost drivers for NZ homes and an appliance savings calculator.
- Auckland Council — Create a healthy, energy-efficient home: Online home assessment tool, HEAT kit borrowing, and links to free Home Energy Advisor consultations.
- Auckland Council — Hire a HEAT kit: How to borrow the Home Energy Audit Toolkit from Auckland Libraries and what it includes.
- NZ Government — Energy efficiency guidance: Central government page consolidating current programmes, eligibility tools, and links to Warmer Kiwi Homes.
- Auckland Climate Action: Guidance on the integrated whole-home approach to moisture, ventilation, and thermal performance for Auckland homes.
- Pure & Co — Reducing indoor humidity: Practical resource on managing indoor humidity and improving air quality, relevant for Auckland homes addressing moisture control alongside thermal upgrades.